Introduction to Blowouts
A blowout is a hairstyling technique that involves washing the hair, followed by the use of a blow dryer and styling tools to create smooth, voluminous, and polished hair. The essence of a blowout lies in its ability to give hair a sleek and salon-finished appearance without the permanence of chemical treatments. This styling method is particularly popular among individuals looking to enhance their hair’s natural beauty for various occasions, ranging from everyday wear to special events.
The benefits of opting for a blowout are manifold. Not only does it provide an effortlessly chic hairstyle, but it also contributes to a feeling of confidence and sophistication. Many people prefer professional blowouts at salons due to the expertise of trained stylists, as well as the availability of high-quality products and tools that may not be accessible to the average consumer. However, for those who wish to save time and money, achieving a blowout at home has become an increasingly appealing option.
By mastering the technique of blowouts in the comfort of one’s home, individuals can enjoy a salon-quality finish without the recurring expense of salon visits. Furthermore, scheduling a blowout appointment can often lead to inconvenient delays, while at-home styling aligns with one’s own timeline and routine. In this comprehensive guide, readers can expect to find step-by-step instructions that cover everything from the preparation stages and necessary tools to the blowout process and aftercare. Each segment aims to empower readers, making it possible for anyone to achieve that coveted, polished look without needing exhaustive training or professional equipment.
Tools and Products You Will Need
Achieving an impeccable blowout at home requires the right tools and products to ensure optimal results. The first essential item on your list should be a high-quality hair dryer. Look for a dryer that features adjustable heat settings, a powerful motor, and a concentrator nozzle. A good hair dryer helps minimize frizz and promotes smoother strands, making it a crucial element for a flawless finish.
Next, consider investing in round brushes, which are pivotal in shaping your hair as you dry it. The size of the brush should depend on your hair length; larger brushes work well for longer hair, while medium or smaller brushes are better suited for shorter styles. Bamboo or ceramic brushes can also enhance heat distribution, helping to create volume and shine.
Sectioning clips are another important tool, as they allow you to divide your hair into manageable sections. Working with smaller sections helps ensure that each area is thoroughly dried and styled. It’s recommended to use strong, non-slip clips to hold your sections securely in place while you work.
Applying a heat protectant spray is crucial to safeguard your hair against damage from the heat of the dryer. Look for products that contain nourishing ingredients to help maintain your hair’s health while providing a shield against high temperatures. Additionally, volumizing mousses or sprays can enhance body and lift, particularly for fine or limp hair types, creating that bouncy blowout look.
Choosing the right tools based on your hair type is essential for achieving the perfect blowout. For instance, if you have curly or thick hair, consider a dryer with higher wattage and a wider barrel brush for faster drying. For fine or straight hair, a combination of a lower heat setting and a smaller round brush may suffice. By meticulously selecting your tools and products, you set the foundation for a successful at-home blowout.
Preparing Your Hair for the Blowout
Achieving a professional-looking blowout at home begins with proper hair preparation, a crucial step that significantly impacts the final result. Washing your hair with a suitable shampoo and conditioner tailored to your hair type is essential. For instance, those with fine hair may benefit from volumizing products, while individuals with thicker hair should opt for moisturizing formulations to prevent dryness. It is vital to thoroughly cleanse the hair to remove any product buildup, which can hinder the blowout process.
Once the hair is clean, applying a heat protectant is a necessary step. This product creates a barrier between your hair and the high temperatures of styling tools, safeguarding your strands from damage. Look for a heat protectant that not only guards against heat but also adds shine and smoothness. Additionally, incorporating a leave-in conditioner or a styling cream can enhance manageability, making it easier to achieve a sleek look. These products provide extra hydration and control, which can be particularly beneficial for frizz-prone hair.
After applying the necessary products, the next step is to towel-dry your hair correctly. It’s crucial to use a microfiber towel or an old cotton t-shirt instead of a traditional towel to minimize friction and prevent frizz. Gently squeeze out excess water without rubbing or tugging at your hair. This careful technique preserves your hair’s natural moisture and prepares it for a seamless blowout. By taking the time to prep your hair with appropriate products and techniques, you pave the way for a more manageable blowout, ensuring your styles last longer and look polished. Every step contributes to achieving that desired salon-quality finish at home.
Sectioning Your Hair
Achieving an impeccable blowout at home begins with proper sectioning of the hair. This vital step not only streamlines the blow-drying process but also enhances your overall control and results. To begin, gather the necessary tools, including hair clips or ties to hold sections in place, as well as a quality hairbrush suited for blow-drying. The ideal method involves dividing your hair into manageable portions, which allows for better airflow and prevents tangling or frizz during the styling process.
Start by parting your hair into four main sections. Create a horizontal part that separates the front of your hair from the back, followed by a vertical part down the center of the back. This technique works effectively for various hair types and lengths. After establishing these sections, secure the front two sections with clips, ensuring that they are out of the way while you focus on the back. It is advisable to work from the nape of the neck upward, as this approach facilitates a more even and polished finish. By starting at the base, you will efficiently eliminate dampness and create volume as you move towards the crown.
As you begin to blow-dry each section, remember to take smaller subsections, preferably one to two inches wide. This practice allows for greater heat distribution and styling precision, significantly reducing the risk of heat damage. Additionally, using a round brush can help you achieve that sought-after smooth and voluminous look. Repeat this process until all sections are dry, ensuring that each one receives ample attention. Proper sectioning not only expedites your blowout routine but also contributes to a salon-quality finish, making it an essential component of your at-home styling technique.
The Blowout Technique
Achieving a perfect blowout at home requires a combination of technique, the right tools, and practice. This process begins with ensuring that your hair is clean and slightly damp, as this allows for better styling. The first step is applying a heat protectant, which helps shield your strands from damage while providing some hold. Afterward, section your hair into manageable portions—typically, two to four sections depending on thickness. Secure each portion with clips to maintain organization throughout the blowout process.
Using a round brush is essential for creating volume and shape. Begin by positioning the brush under the hair section at the roots. As you apply heat with your hairdryer, roll the brush outward away from your scalp. This method lifts the hair away from the head, promoting root volume. Hold the hairdryer at a downward angle—this helps create sleekness and minimizes frizz. Ensure the airflow is directed along the hair’s cuticle to enhance shine and smoothness.
For curls or waves, manipulate the brush differently. Instead of rolling the brush straight down, rotate it as you pull it through the hair. This technique enables you to create soft curls. For tighter curls, leave the brush in the hair a bit longer before releasing it, while for looser waves, just a quick roll will do. Adjust the angle of the hairdryer based on the desired curl direction; for inward curls, direct the air upward at the roots, and for outward curls, aim downwards.
As you work your way through each section, continually assess the volume and movement of your hair, adjusting your brush and dryer angle accordingly. The combination of technique and tool manipulation is crucial for achieving a polished final look, regardless of whether you desire sleek straight hair, soft curls, or voluminous waves. With practice, this blowout technique can be refined to suit your own styling preferences.
Adding Volume and Body
To achieve a voluminous blowout at home, it is essential to begin with the right products and techniques. Utilizing volumizing shampoos, conditioners, and styling products plays a significant role in creating body and lift. Look for products labeled as “volumizing” or “thickening,” as they often contain ingredients that plump up the hair strands. Applying a volumizing mousse or spray to damp hair can provide a solid foundation for added fullness, ensuring that your blowout lasts longer.
Another effective method to enhance volume is to blow-dry your hair while leaning forward with your head upside down. This simple technique allows gravity to assist in lifting the hair from the roots, resulting in a bouncy finish. Use a round brush while blow-drying to further amplify the volume; start at the roots and work your way down the lengths of your hair, rolling the brush under as you go. This technique creates soft curves while elevating the roots.
Additionally, consider incorporating root-lifting sprays or powders into your routine. These specialized products are designed to provide an immediate boost at the base of your hair, setting the stage for volume and fullness. Applying these products before blow-drying can significantly enhance the overall appearance of your blowout.
For those who desire even more height, a teasing comb can be an invaluable tool. After blow-drying, gently backcomb sections of hair at the roots, concentrating on areas where added volume is needed, such as the crown. Once this is done, smooth the top layer over the teased sections to maintain a polished appearance. Combining these techniques and products will help you achieve a salon-quality blowout with remarkable volume and body right from the comfort of your home.
Finishing Touches
After achieving the desired volume and smoothness in your blowout, the finishing touches play a crucial role in enhancing both the style and longevity of your look. Utilizing finishing sprays, serums, or oils can significantly elevate the overall appearance of your hair, providing an attractive shine while maintaining hold throughout the day. These products not only enrich the hair’s texture but also help manage any frizz that may have developed during the styling process.
When selecting a finishing spray, look for one that offers both hold and shine without leaving a sticky residue. A light misting is often sufficient to achieve a polished finish. For those preferring a more sleek appearance, a serum can be applied after your blowout. A small amount, roughly a pea-sized portion warmed between your palms, can be distributed evenly through the mid-lengths and ends of the hair. This method ensures that the serum is well-integrated to avoid heavy or greasy strands.
Another worthwhile step in the finishing process involves cooling the hair to help set the style. After completing your blowout, switch your blow dryer to a cool setting and lightly direct the air onto your styled hair for a few moments. This technique aids in locking in the shape and volume you’ve created, making your blowout last longer. It is essential to avoid over-manipulating your hair during these finishing stages; excessive touching or styling can undo the work you have put into your blowout and create unwanted frizz or flattening.
By combining these finishing touches, you can elevate your blowout from a simple styling routine to a flawless, salon-worthy look that stands out and lasts. Achieving shiny, healthy-looking hair requires a gentle touch and thoughtful product application. This attention to detail ensures that your blowout remains beautiful and resilient throughout the day.
Maintenance to Prolong Your Blowout
After investing time and effort into achieving the perfect blowout at home, proper maintenance becomes essential to extend its longevity. One of the primary challenges in maintaining a blowout is humidity, which can quickly lead to frizz and the loss of volume. To combat humidity, consider using a high-quality anti-humidity spray or a lightweight hairspray designed to shield your style from moisture. Additionally, avoid exposing your hair to high levels of heat and steam, which can disrupt the sleek finish of your blowout.
Sleeping can also pose a challenge to your freshly styled hair. To avoid flattening your blowout while you sleep, opt for a silk or satin pillowcase, which reduces friction and helps maintain the hairstyle’s integrity. Alternatively, you can loosely tie your hair in a high ponytail or a loose bun to prevent it from becoming tangled while you rest. Using a soft scrunchie can help minimize the risk of creasing, allowing you to wake up with your blowout intact.
As the days progress, refreshing your blowout may be necessary to maintain its appearance and volume. On the second or third day post-styling, consider using a dry shampoo to absorb excess oil and add body to your hair. Simply apply the dry shampoo at the roots, allow it to sit for a few minutes, and then fluff your hair with your fingers to restore movement. If needed, you can also use a flat iron or curling wand to touch up any sections that may have lost their shape. By following these maintenance tips, you can ensure that your blowout remains as fresh and fabulous as possible throughout the week.
Common Mistakes to Avoid
Achieving a salon-quality blowout at home requires careful attention to detail, and several common mistakes can hinder this goal. Understanding these pitfalls can lead to a more successful hair-styling experience. One prevalent error is using the wrong temperature setting on the blow dryer. Utilizing a high heat setting might seem effective for quick drying, but it can damage the hair and lead to frizz. Instead, start with a medium heat setting, gradually increasing it only as necessary. This approach balances efficiency and hair health, allowing for a smoother finish without excessive heat damage.
Another significant mistake is improper sectioning of the hair. Many individuals tend to grab large sections or neglect to secure the hair effectively, leading to uneven results. To avoid this, it is crucial to divide the hair into manageable sections, typically around 1-2 inches wide for best results. Use clips to secure each section and work methodically through your hair. This method not only promotes evenness in the styling process but also helps in achieving volume and bounce.
Additionally, overloading on products is a common misstep that can weigh the hair down and lead to a greasy appearance. While using styling products can enhance a blowout, applying them excessively can result in the opposite effect. It is advisable to use a small amount of heat protectant or volumizing mousse, applying it evenly throughout damp hair. By focusing on quality over quantity, you can achieve optimal styling without compromising hair integrity.
By being mindful of these common mistakes—temperature control, sectioning, and product application—the process of achieving the perfect blowout at home can become more efficient and yield impressive results.
Conclusion: Enjoy Your Gorgeous Blowout
Achieving the perfect blowout at home can be a rewarding experience that enhances both your confidence and your appearance. As you progress through the steps outlined in this guide, it is important to remember that practice is key. Each attempt will refine your technique, bringing you closer to that salon-worthy result. Allow yourself some grace during the learning process and consider each blowout a new opportunity to improve.
The satisfaction that comes from mastering the art of blow-drying is not limited to the aesthetic appeal of your hair. Each successful blowout serves as a reminder of your capabilities, instilling a sense of empowerment and independence. As you become more proficient, you will likely discover new ways to style your hair and experiment with different looks, further enhancing your creative expression. The right blowout can elevate your overall appearance, allowing you to feel poised and polished for any occasion.
Moreover, the confidence boost associated with looking your best cannot be overstated. A well-executed blowout has a way of uplifting your mood and influencing how you project yourself to the world. Whether you are preparing for a special event or simply want to feel fabulous during your daily activities, the effort you put into perfecting your blowout will undoubtedly pay off.
In conclusion, embrace the journey of learning to achieve a perfect blowout at home. Enjoy the process, celebrate your progress, and relish the compliments you will receive along the way. With time and dedication, you will not only master this skill but also reap the benefits of feeling and looking your best.

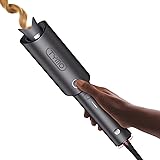
Wavytalk Hair Dryer, Blown Away Ionic Hair Dryer for Curly Hair with Diffuser, 1875W Fast Drying Blow Dryer with Ceramic Technology, 3 Attachments for All Hair Types, Light and Quiet, Rose Gold
$33.82 (as of December 3, 2025 16:07 GMT -05:00 - More infoProduct prices and availability are accurate as of the date/time indicated and are subject to change. Any price and availability information displayed on [relevant Amazon Site(s), as applicable] at the time of purchase will apply to the purchase of this product.)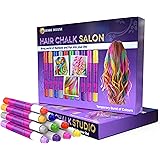
Desire Deluxe - Girls Gifts Hair Chalk 10 Temporary Non-Toxic Easy Washable Hair Dye Colourful Pens
$15.99 (as of December 3, 2025 16:07 GMT -05:00 - More infoProduct prices and availability are accurate as of the date/time indicated and are subject to change. Any price and availability information displayed on [relevant Amazon Site(s), as applicable] at the time of purchase will apply to the purchase of this product.)
Olaplex No. 7 Bonding Oil, Concentrated High Shine Heat Protectant | Visibly Smooths & Softens Hair | Added Color Vibrancy | Up to 72 Hour Frizz Control | For All Hair Types | 1 fl oz
$30.00 (as of December 3, 2025 16:07 GMT -05:00 - More infoProduct prices and availability are accurate as of the date/time indicated and are subject to change. Any price and availability information displayed on [relevant Amazon Site(s), as applicable] at the time of purchase will apply to the purchase of this product.)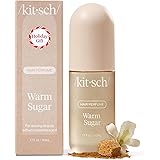
Kitsch Hair Perfume for Women - Warm Sugar | Clean, Deodorizing & Patented Odor-Eliminating Technology Hair Spray & Body Mist - Freshen Hair, Body & Pillows - Pink Grapefruit & Vanilla Scent - 50mL
$19.99 (as of December 3, 2025 16:07 GMT -05:00 - More infoProduct prices and availability are accurate as of the date/time indicated and are subject to change. Any price and availability information displayed on [relevant Amazon Site(s), as applicable] at the time of purchase will apply to the purchase of this product.)